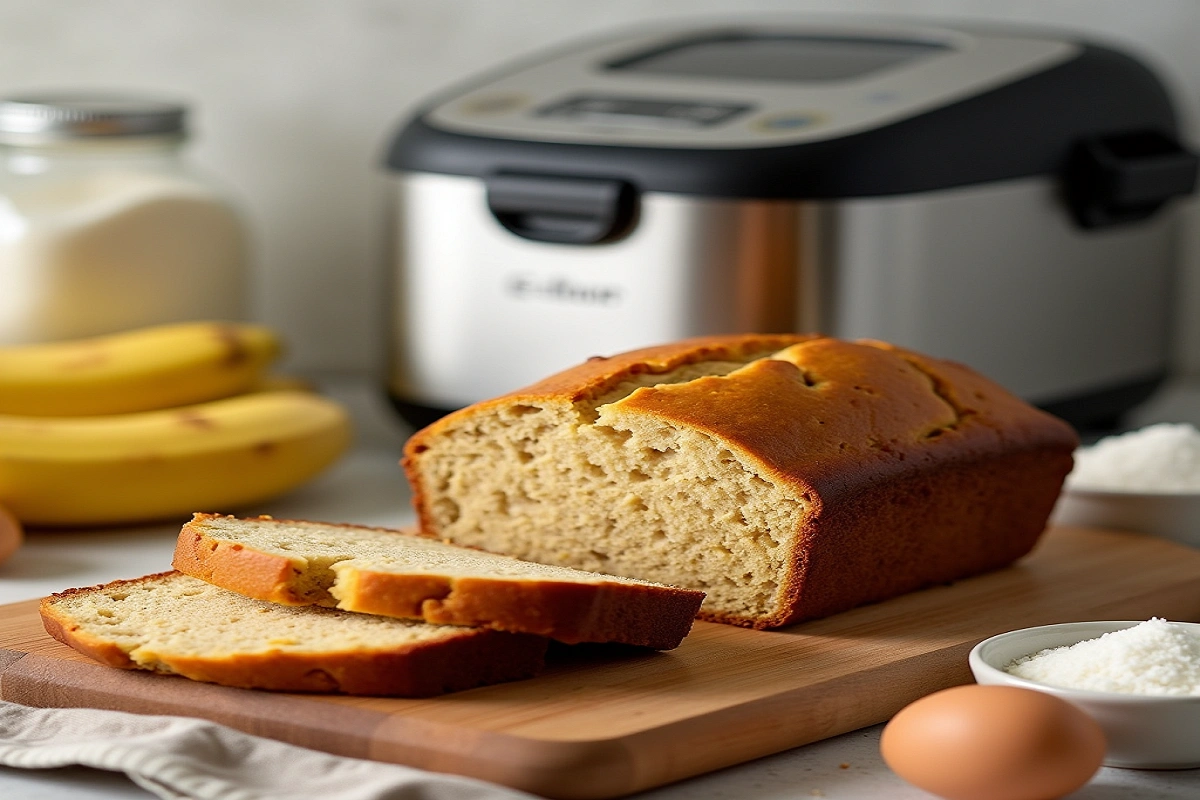
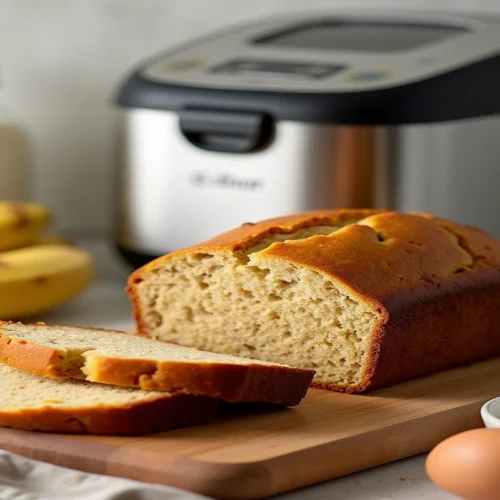
There’s something special about the smell of freshly baked banana bread filling your home. Whether it’s for breakfast, an afternoon snack, or a special treat for the family, banana loaf has been a timeless favorite. But did you know you can make it even easier using a bread maker? If you’ve never tried making banana loaf in your bread machine, now’s the perfect time to give it a go. With the right recipe and a few simple steps, you’ll be able to create a soft, moist loaf that’s full of flavor, with minimal effort.
In this article, you’ll learn everything you need to know about making a banana loaf in a bread maker—from the ingredients to the troubleshooting tips. Let’s dive in!
Why Banana Loaf is a Timeless Favorite for Home Bakers
Banana loaf bread is one of those treats that brings comfort and joy with every slice. Its rich, sweet flavor and tender texture make it irresistible. Whether it’s a rainy day, a lazy weekend morning, or a busy weekday, banana loaf bread has a unique way of making any moment feel special.
For many, baking banana loaf is more than just a kitchen task—it’s a tradition. A recipe passed down from a grandmother, a special treat shared with friends, or a quick way to use up overripe bananas. Whatever your reason for baking banana bread, it’s hard not to feel a sense of satisfaction when that golden-brown loaf comes out of the bread maker.
One of the best things about banana loaf is its versatility. You can tweak the recipe to your liking, adding everything from walnuts and chocolate chips to spices like cinnamon or nutmeg. And with a bread maker, you can enjoy all of this with minimal hands-on effort.
What Makes a Banana Loaf Bread Maker Recipe Different?
The Convenience of Using a Bread Maker
A bread maker is a game-changer for busy bakers. Gone are the days of mixing and kneading by hand or worrying about the right baking time. With a bread maker, all you need to do is load the ingredients, set the machine, and let it do the work for you.
When making banana loaf in a bread maker, the machine ensures that everything mixes perfectly and bakes evenly. Plus, bread makers come with specific settings designed for quick breads, like banana loaf, so you don’t have to worry about getting the timing just right.
Benefits of Using a Bread Maker for Banana Loaf
Here’s why you’ll love making banana loaf in your bread maker:
- Perfect Texture Every Time: The bread maker kneads and bakes the loaf to perfection, ensuring a soft, moist texture.
- No Kneading or Messy Mixing: Unlike traditional baking, there’s no need to get your hands dirty with dough.
- Time-Saving: Let the machine do the heavy lifting while you focus on other tasks.
- Hands-Off Baking: Simply set the bread maker and come back to a delicious loaf.
Different Types of Bread Makers
Not all bread makers are created equal, but many feature settings specifically for quick breads like banana loaf. These settings are designed to ensure the perfect rise and texture for moist loaves without requiring any special attention. Be sure to check your bread maker’s manual to ensure it has a “quick bread” or “cake” setting that suits banana loaf.
The Key Ingredients for a Perfect Banana Loaf
Making banana loaf in your bread maker is simple, but the quality of the loaf depends largely on the ingredients. Here’s a breakdown of what you’ll need:
- Bananas: Choose ripe bananas for sweetness and moisture. Overripe bananas work best because they provide extra sweetness and make the loaf extra moist.
- Flour: All-purpose flour is the standard choice, but you can swap it out for whole wheat flour if you prefer a denser loaf.
- Sugar: White or brown sugar will both work, but brown sugar adds a deeper, richer flavor.
- Butter/Oil: Both butter and oil will keep your loaf moist, but butter adds a richer taste.
- Baking Powder & Baking Soda: These leavening agents help your loaf rise and give it the fluffy texture we all love.
- Eggs: Eggs provide structure, moisture, and richness to your loaf.
- Optional Add-ins: Consider adding nuts like walnuts or pecans, chocolate chips, or even dried fruit for a creative twist.
- Substitute Ingredients: If you need dairy-free or gluten-free options, there are plenty of alternatives. You can use coconut oil instead of butter, and gluten-free flour blends work well as a flour substitute.
How to Make Banana Loaf in a Bread Maker: Step-by-Step Guide

Making banana loaf in a bread maker is easy, and the results are always satisfying. Here’s your step-by-step guide to baking the perfect banana loaf:
Step 1: Prepare Your Ingredients
Before you begin, ensure you have all your ingredients ready:
- Mash the bananas in a bowl, making sure there are no large lumps.
- Measure out your dry ingredients, such as flour, sugar, and baking powder, and set them aside.
Step 2: Load the Bread Maker
Here’s how to load your bread maker for the perfect banana loaf:
- Wet ingredients first: Start by adding the mashed bananas, eggs, and butter or oil to the bread maker pan.
- Dry ingredients on top: Next, add the flour, sugar, baking powder, baking soda, and any spices or add-ins.
- Optional ingredients: If you’re adding nuts, chocolate chips, or other mix-ins, add them now.
Step 3: Set the Bread Maker
Now it’s time to choose the right setting:
- Select the “quick bread” or “cake” setting on your bread maker.
- Choose the size of your loaf (small, medium, or large).
- Press start and let your bread maker do the work!
Step 4: Bake and Wait
Let the bread maker run through its baking cycle. It will mix, knead, and bake the banana loaf all on its own. Typically, banana loaf takes about 60 minutes to bake, but check the machine’s manual for specific timing.
Step 5: Cool and Serve
Once the bread maker finishes, remove the loaf from the pan and let it cool for a few minutes. Slice it up, and enjoy the delicious results!
Table: Banana Loaf Bread Maker Ingredients
| Ingredient | Amount |
|---|---|
| Ripe Bananas | 2-3 medium |
| All-Purpose Flour | 1 1/2 cups |
| Sugar (white/brown) | 3/4 cup |
| Baking Powder | 1 tsp |
| Baking Soda | 1/2 tsp |
| Eggs | 2 large |
| Butter or Oil | 1/4 cup |
Expert Tips for a Foolproof Banana Loaf in Your Bread Maker
To make sure your banana loaf turns out perfectly every time, here are a few expert tips:
- Use Overripe Bananas: The riper the bananas, the sweeter and moister your loaf will be. Make sure they’re well-spotted, if not nearly black.
- Don’t Overmix: When combining the ingredients, stir until just combined. Overmixing can make your loaf dense.
- Room Temperature Ingredients: To ensure smooth mixing, let your eggs and butter come to room temperature before adding them to the bread maker.
- Customize with Add-ins: Get creative by adding chocolate chips, chopped nuts, or even a bit of cinnamon to your loaf.
- Avoid Opening the Lid: Let the loaf rise fully without peeking to prevent it from deflating during baking.
Troubleshooting Your Banana Loaf Bread Maker Recipe
Even with a bread maker, things don’t always go as planned. Here are a few common issues and how to fix them:
The Loaf is Too Dense
If your loaf turns out dense, it may be due to overmixing or using too much flour. Try using a light hand when mixing and measure your flour correctly.
The Loaf Won’t Rise Properly
Ensure that your baking powder and baking soda are still fresh.
. If they’re too old, they won’t work as well. Also, make sure you’re not overloading the bread maker with too many ingredients.
The Loaf is Too Wet or Too Dry
If your loaf is too wet, add a little more flour next time. If it’s too dry, increase the amount of mashed bananas or butter.
Uneven Texture
Ensure all your ingredients are evenly distributed in the bread maker. If you’re adding mix-ins like nuts or chocolate chips, fold them in gently so they don’t weigh down the batter.
How to Serve and Store Your Banana Loaf Bread Maker Creation
Once your banana loaf is baked and cooled, it’s time to enjoy it! Here are a few serving ideas:
- Serve warm with butter or cream cheese for an extra indulgent treat.
- Enjoy it alongside a warm cup of coffee or tea for an ideal afternoon treat.
Storing Leftovers
If you have any leftover banana loaf, here’s how to store it:
- Store it in an airtight container at room temperature for up to three days.
- Freezing: Slice the loaf and wrap individual pieces in plastic wrap before freezing. You can freeze it for up to three months.
A Simple, Delicious, and Reliable Banana Loaf Recipe You’ll Make Again and Again
Making banana loaf in a bread maker is one of the easiest ways to enjoy this classic treat. With just a few simple ingredients, your bread maker will do all the work, delivering a soft, moist loaf every time. Whether you’re new to baking or a seasoned pro, this recipe guarantees delicious results with minimal effort. So, grab those overripe bananas and get baking—you won’t regret it!
Ready to bake your own banana loaf? Share your results with us on social media or in the comments below. If you have any tips or variations of your own, we’d love to hear about them!
If you’re looking for a slightly different take on banana bread, be sure to check out our Yeasted Banana Bread Recipe for a deliciously fluffy, yeasted twist on this classic treat.
banana loaf bread maker recipe
Ingredients
- 3 ripe bananas (mashed)
- 1/2 cup (120g) unsalted butter, melted
- 1/2 cup (100g) granulated sugar
- 2 large eggs
- 1 teaspoon vanilla extract
- 2 cups (240g) all-purpose flour
- 1 teaspoon baking powder
- 1/2 teaspoon baking soda
- 1/4 teaspoon salt
- Optional: 1/2 cup (60g) chopped walnuts or chocolate chips
Instructions
- Prepare your ingredients: Ensure the bananas are ripe and mashed, and have the butter melted. Preheat your bread maker according to its settings.
- Combine wet ingredients: In a bowl, whisk together the mashed bananas, melted butter, eggs, and vanilla extract until smooth.
- Add dry ingredients: In a separate bowl, sift together the flour, baking powder, baking soda, and salt. Gradually add the dry ingredients to the wet mixture, mixing just until combined.
- Add optional ingredients: If you're adding nuts or chocolate chips, fold them into the batter.
- Transfer to bread maker: Pour the batter into the bread maker's loaf pan, ensuring it's evenly spread.
- Bake: Select the "Quick Bread" setting on your bread maker and bake for about 1 hour and 30 minutes or until a toothpick inserted into the center comes out clean.
- Cool and serve: Let the loaf cool in the bread maker for about 10 minutes, then remove and transfer it to a wire rack to cool completely.